This is my third guitar, the Orange guitar. Since I have not yet started the dye
process, it is not orange, so don't worry about that. I am starting this guitar at
zero, where I normally start. I purchase my body's shaped and drilled and routed,
but un-finished. So this photo-log will start with the body as it came from the
shop. The neck is largely done. All I need to do to is add the nut and the
tuners, then attach it.
The details on this guitar are:
- Body from Musikraft in New Jersey. 5A
quilted. But still very different from the body that I got from Warmoth that became the Blue Guitar.
- Neck is also from Musikraft. Double action truss rod, accessible from behind the
nut.
- Bridge is a Fishman Transducer unit.
- PUPs are Fralin Blue's model. Very
nice.
- The dye is a water based dye that I mixed myself. Got the supplies from LMII in Healdsburg CA. I wanted Orange, but got
Salmon Pink. OK with me.
- The lacquer is clear Nitro from StewMac.
- The knobs are actually from Fender. Something
on this is "real."
- And the fine tuning and correction of my errors, not that I made (too) many... is Keith
Holland at the Guitar Hospital is Los Gatos, CA
- The tuners on this guitar are Kluson, non locking type.
- The nut I did my self.
A tip: Schatten Designs makes a template
that you can use to mark your nut, rather than trying to do all the math yourself.
Makes the nut job much easier.
************************************************
Taking these raw, naked, body pictures was tough. Most of them have a muave bloom
over them. They are still not as good as the photo's Warmoth takes, but a zillion
times better than my first efforts.
So, the body......
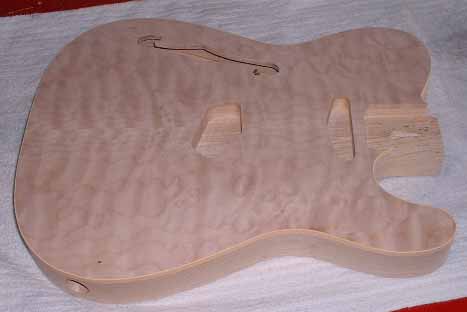
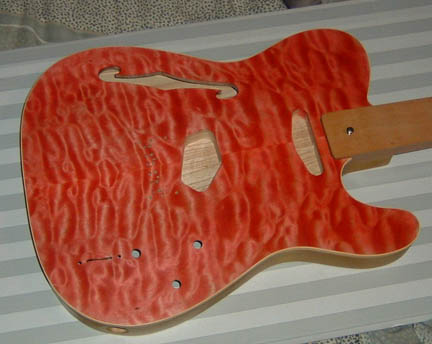
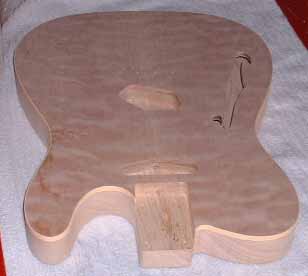 This is
the way the body came from Musikraft. The f-hole is there, and the jack hole is
there. Nothing else. I did not take any pictures of the Blue guitar before
staining, and I wish I had. Both are quilted Maple, and they are still very
different. This will show up after the staining. The Orange guitar is more
subtle in its grain, the Blue more bold.
This is
the way the body came from Musikraft. The f-hole is there, and the jack hole is
there. Nothing else. I did not take any pictures of the Blue guitar before
staining, and I wish I had. Both are quilted Maple, and they are still very
different. This will show up after the staining. The Orange guitar is more
subtle in its grain, the Blue more bold.
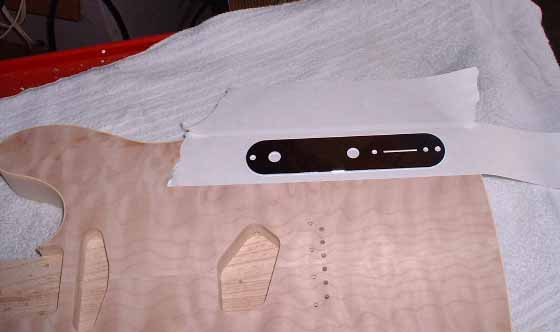 I have taped the body and located the controls before drilling. I use a
standard Tele mounting plate for sizes and distances. In this case, I have reversed the
controls and put the switch towards the heel of the guitar.
I have taped the body and located the controls before drilling. I use a
standard Tele mounting plate for sizes and distances. In this case, I have reversed the
controls and put the switch towards the heel of the guitar.
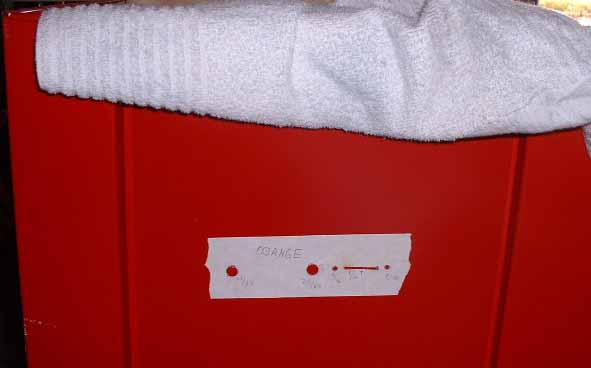
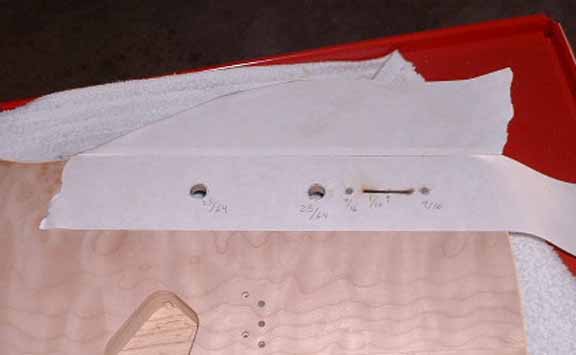 After drilling. To make sure that I get the right sized hole, I wrote the drill size
on the tape. Very anal, but reduces the chaces of a FUBAR. And at the price of
these bodies, a FUBAR is a big deal. For the switch, what I did was I drilled a hole
at both ends of the slot, and then used a Dremel tool with a cutting blade to finish the
cut. To smooth it out, I will use a finger nail file.
After drilling. To make sure that I get the right sized hole, I wrote the drill size
on the tape. Very anal, but reduces the chaces of a FUBAR. And at the price of
these bodies, a FUBAR is a big deal. For the switch, what I did was I drilled a hole
at both ends of the slot, and then used a Dremel tool with a cutting blade to finish the
cut. To smooth it out, I will use a finger nail file.
 After the tape was removed. The biggie here is that there was no tape residue.
Given that I stole this tape from work, I am not sure of the model number.
But it is from 3M. You can buy this tape at pretty much any hardware store like Home
Depot, Lowes, etc. It is painting tape. I suspect that the adhesive on this tape is
a derivitive of the adhesive used for PostIt Notes.
After the tape was removed. The biggie here is that there was no tape residue.
Given that I stole this tape from work, I am not sure of the model number.
But it is from 3M. You can buy this tape at pretty much any hardware store like Home
Depot, Lowes, etc. It is painting tape. I suspect that the adhesive on this tape is
a derivitive of the adhesive used for PostIt Notes.
 I decided to save the tape and I stuck it to the side of my tool box. No real
reason, other than "because".
I decided to save the tape and I stuck it to the side of my tool box. No real
reason, other than "because".
*******************************************
I have recently run into the Fishman pickups, and this guitar is going to get a Fishman
Pizeo Tele bridge PUP as well as the standard Tele PUPs. I thought that this mad
sense since the guitar is a Thinline with f-hole. Yee-hah.
*******************************************
21 Jan, 03
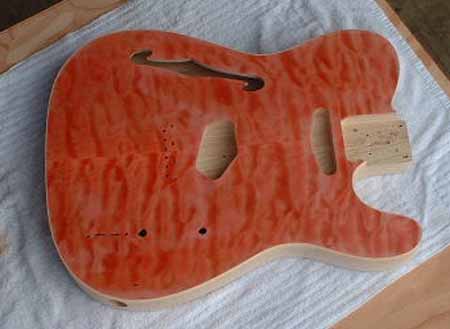
I started to dye the top of the Orange guitar. In the pictures, the guitar looks
orange, but in real life it is more pinkish. I am not sure what it will
look like when it is all done. The dye is still a bit damp, which is why it looks
uneven. I apply several coats of water based dye, and sand in-between coats.
The water based dye pops the grain a bit and you have to bring it down even. I even
mixed my own "vintage" color dye for the backs and sides. I will post
photos when I can. I mix and store my dyes in baby food jars. Since the baby
no longer eats baby food, I have to find an alternate source for jars. And the latex
gloves keep my hands clean.

*******************************************
3 Feb, 03
I did my dyes and then scraped the binding today. Scraping is a bit nerve
racking. You are taking a razor blade to your creation, and trying to scraped off
some dye, while NOT cutting up the nice soft plastic binding. Harder than it sounds,
but I did it with no major FUBARs.
And I figured that since it was scraped, I would start the Nitro spraying process.
I started it even though I am still waiting on the Fishman power bridge and a
modified pickguard/neck PUP holder. I will drill the required holes later.
Probably not the smartest approach, but I want it done so that I can start on the other
guitars. 2 small runs, and a couple of small bubbles. Nothing that would show
in a photo, but you can see it with the naked eye. So I will let it all dry and then
sand it out with some 400 grit sandpaper. But that first layer of nitro really helps
with the look: color, depth of quilting, everything.
There is a moral here: I charge ahead when I should be procrastinating, and I
procastinate when I should be charging ahead.
**********************************************
5 Feb, 03
I did the first sanding today. Had to get the run out, which I pretty much did.
Even though I can't feel it, I can see it. I used 400 grit and a sanding
block on the flat surfaces, and my finger for the sides of the guitar. Wiped it off
and applied some more dye to the back and sides. Seemed to need it. Then
another light coat of Nitro. It has to sit 24 hours before I can apply grain filler,
which is next Tuesday by my schedule. So next Wed I should be able to start applying
the final heavy coat of Nitro.
**********************************************
11 Feb, 03
I got the Fishman bridge today, the AST version. There are two versions, and it
may have contributed to a big challenge.
First, the saddles on the bridge are part of the Piezo PUP, so you can not man handle
the thing. And of course the wires are fragile. I was warned before I took it
home, and I am glad, or I would have FUBAR'd it for sure.
So the first thing that you have to do is drill some new bridge mounting holes, as the
stock ones won't work. So I put the bridge PUP in the bridge, and ran the wires
through the hole to the control cavity. Then I put down some non-stick/no-residue tape to
protect the guitar top to mark where the holes go. Then I was going to use some
tooth picks through the string holes to finish the alignment process. But Nooooooo.
The Fishman AST bridge string holes are about 1/4" closer to the PUP than the
holes in my guitar. This also means that I have to fill the holes already existing for the
string ferrules. Then dye the filler. Not onerous, just a pain in the rump.
So..... I used a small t-square to line up the bridge square to the neck pocket. And
it calls for a 7/65" hole. And I have 5/64" and 9/64" bits.
Naturally. So now I have a shopping list for Home Depot tonight.
Fortunately, Fishman includes a hard paper template to use as a drill guide. So I
will drill the bridge mounting holes, then screw the template to the body, and drill the
string holes that way. It may end up wrong, but it will be consistently wrong.
And it will be another week before I can apply the final coat of Nitro. Argh!
***********************************************
12 Feb, 03
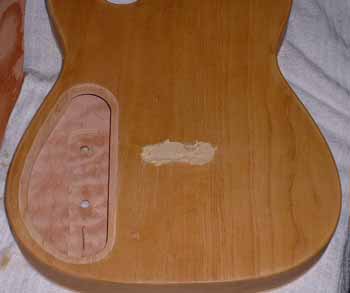 This is what a guitar looks like with wood putty in the string holes. More
Argh!
This is what a guitar looks like with wood putty in the string holes. More
Argh!
PS: It is raining today so I could not spray if I wanted to. Oh well.
************************************************
19 Feb 03
Still more rain in the early part of the day. It has not rained in a week.
Now today again.
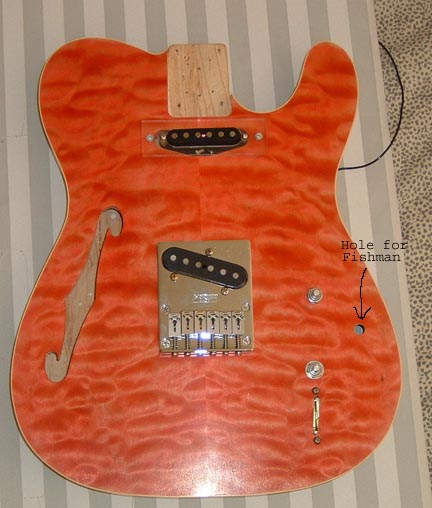
So I drilled another hole for the Fishman PowerChip switch. A little too close
the edge of the cavity, but it works.
 You can see where the new hole is. I wanted it out of the way, which it is.
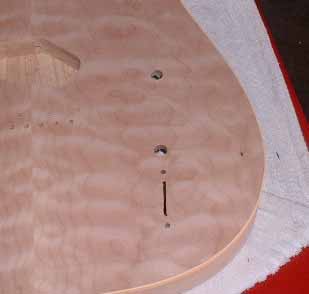
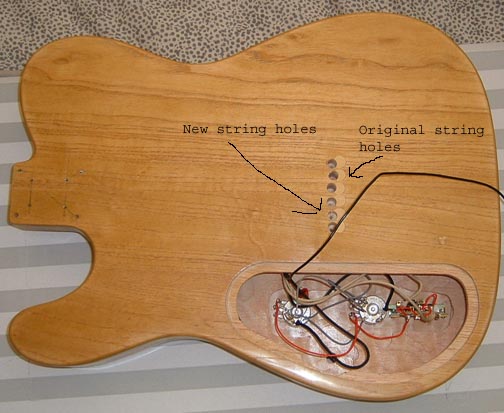
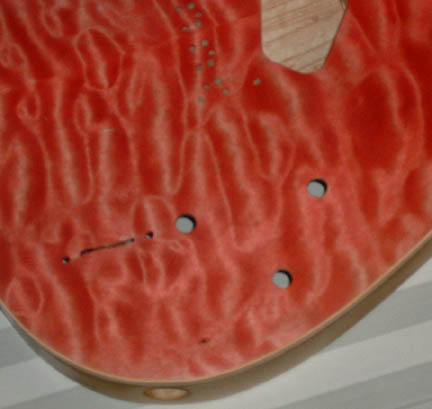 Close up of same. Also, you can see the two rows of string holes. The
forward ones I drilled today. Took a while to find 1/8" bit that was long
enough to get through the body. Home Depot does not carry such a thing.
Fortunately, there is a specialty wood working store near me, and they had the bit I
needed.
Close up of same. Also, you can see the two rows of string holes. The
forward ones I drilled today. Took a while to find 1/8" bit that was long
enough to get through the body. Home Depot does not carry such a thing.
Fortunately, there is a specialty wood working store near me, and they had the bit I
needed.
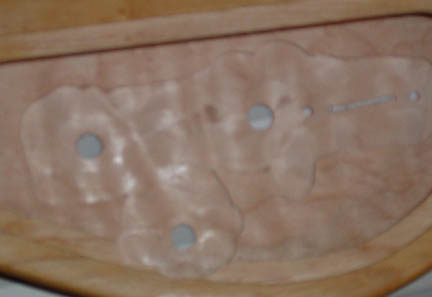 The control cavity from the back. Sorry for the focus problem. For some
reason, the camera does not like the back of this guitar. You can't really tell, but
the back of the cavity is much smoother than the Blue Guitar. The reason is that I
purchased a real router, and did it properly. Makes a big difference.
The control cavity from the back. Sorry for the focus problem. For some
reason, the camera does not like the back of this guitar. You can't really tell, but
the back of the cavity is much smoother than the Blue Guitar. The reason is that I
purchased a real router, and did it properly. Makes a big difference.
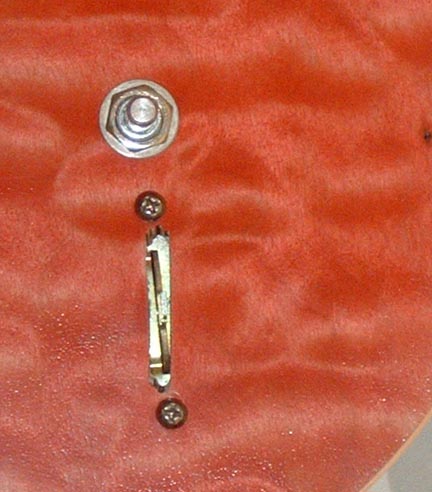
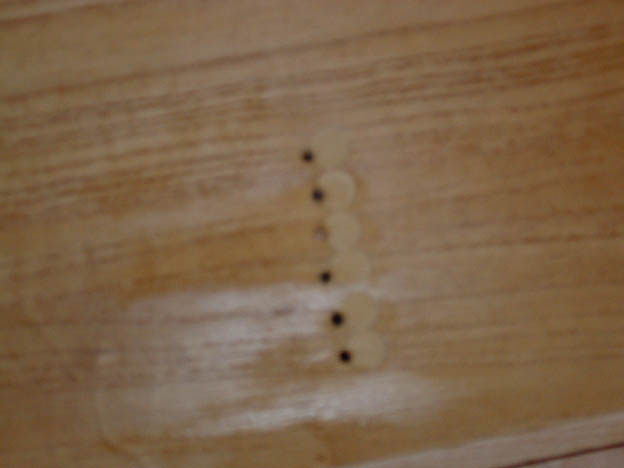 A close up of the new string holes, and the filled in old ones. Fishman makes
a sticker that I might put there to cover them.
A close up of the new string holes, and the filled in old ones. Fishman makes
a sticker that I might put there to cover them.
In addition to drilling the new holes for the strings, I also had to drill new holes to
mount the bridge to, which I expected. I failed to take a picture, but what I did
was to insert the PUP in the bridge, then I located bridge and then marked & drilled
those holes. Then to mark & drill the string holes, I took the template that
Fishman provides, and I used four small screws, smaller than the holes I drilled, and I
mounted the template where the bridge would go. Best way that I could think of to do
this.
I did manage to spray a coat of Nitro in the afternoon. I will drill the string
ferrule holes after the body is sprayed. I think.
*****************************************************
24 Mar 03
Due to the weather in the SF Bay Area, it was a while before I could spray Nitro.
Every day off was a rain day. Then about 2 weeks ago, it cleared up and the
weather was nice. So I sprayed the Orange Guitar, did the finish, and put on the
electronics. These pictures are the proof.
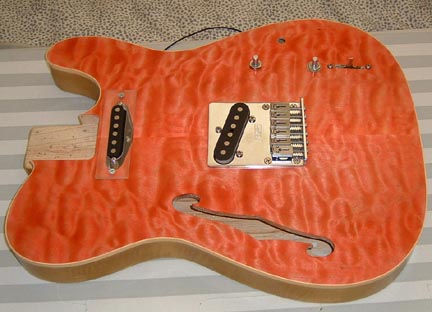
 I
have the bridge on, and the neck PUP. I used my little mounting doohickey again.
Can't stand pickguards on such nice wood. I don't know what those dots are
inside the f-hole. And the wire off to the right is the wire from the Fishman piezo
PUP.
I
have the bridge on, and the neck PUP. I used my little mounting doohickey again.
Can't stand pickguards on such nice wood. I don't know what those dots are
inside the f-hole. And the wire off to the right is the wire from the Fishman piezo
PUP.
 Side view of the same guitar.
 Close up of the switch. I managed to rout the slot for the switch a little
off center. *&6 and ^&$^&% and other bad words. In the future I
will build a standard routed guitar.
Close up of the switch. I managed to rout the slot for the switch a little
off center. *&6 and ^&$^&% and other bad words. In the future I
will build a standard routed guitar.
 The back of the guitar. BTW: The dye on the back is one that I mixed myself.
Got it right the first time out, IMHO. You can see where I had to drill new
string holes. Yes, they are off center a bit. But it is manageable. I
have enough Nitro on this to keep the wood putty in place. I hope.
The back of the guitar. BTW: The dye on the back is one that I mixed myself.
Got it right the first time out, IMHO. You can see where I had to drill new
string holes. Yes, they are off center a bit. But it is manageable. I
have enough Nitro on this to keep the wood putty in place. I hope.
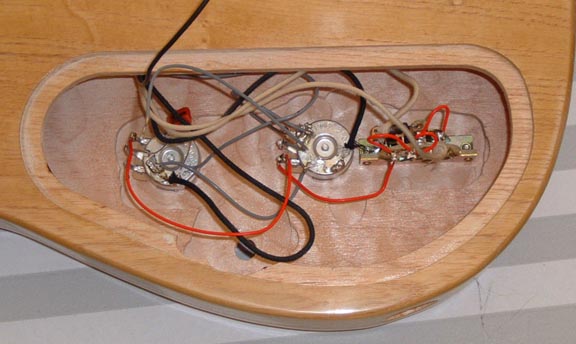 Close up of the control area. There are only two loose wires in here: One is
the Fishman wire, the other is the hot for the jack, which will go to the Fishman switch
that I have not yet installed. You can see where I ran the router up to the edge of
the control pocket. What you can't see is that I also took out just a sliver of the
body as well. Not much, you have to know where it is.
Close up of the control area. There are only two loose wires in here: One is
the Fishman wire, the other is the hot for the jack, which will go to the Fishman switch
that I have not yet installed. You can see where I ran the router up to the edge of
the control pocket. What you can't see is that I also took out just a sliver of the
body as well. Not much, you have to know where it is.
*********************************************************
4 Mar, 2003
It's done!!! And it is fun, and the tone is excellent. Pretty much what I
have been looking for a long time. And sustain up the yingyang. The
weight of this thing is almost zero. The body less the neck weighs less than the
PUPs (Fralin). BTW: I got smart. Rather than fat-finger the solder job on the
Fishman stuff, I had my Luthier do it for me. He did it right, where as I probably
would have messed it up something fierce. Also, he had to shim the neck to get the
proper amount of pressure on the Fishman bridge, so that the peizo PUPs would work.
One little funny thing on the tuners. My first experience with non-locking
tuners. I had no idea how to get the strings in. Once Keith showed me how, it
was "D'oh" time.
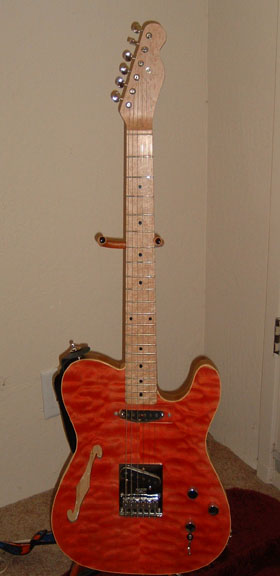 As
I play it. Lots of fun.
As
I play it. Lots of fun.
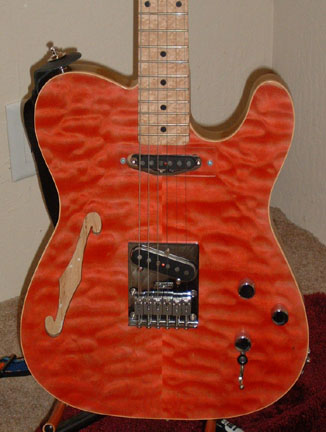 Close up photo. Again, no pickguard, just the mount that I made for the neck
PUP.
Close up photo. Again, no pickguard, just the mount that I made for the neck
PUP.
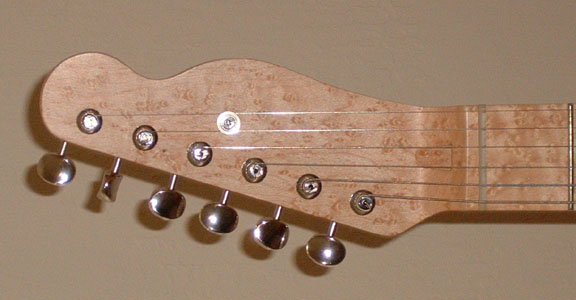 Close up of the head stock. The neck is birdseye maple with a birdseye maple
fretboard. Clear satin finish, no tint.
Close up of the head stock. The neck is birdseye maple with a birdseye maple
fretboard. Clear satin finish, no tint.
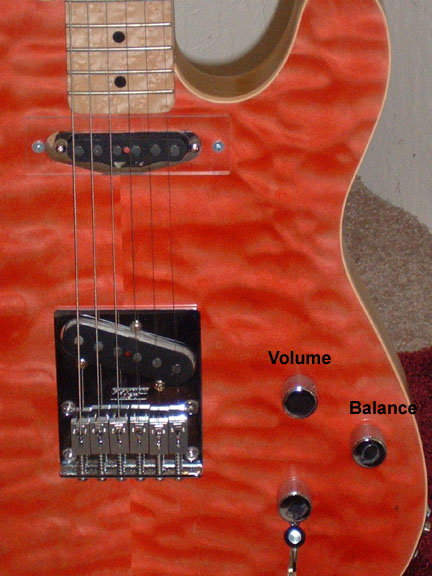 Close up of the controls. I went to get some colored knobs, but they weren't
the right color. Blood red, and this guitar is actually a Salmon Pink color, rather
than Orange. Works for me.
Close up of the controls. I went to get some colored knobs, but they weren't
the right color. Blood red, and this guitar is actually a Salmon Pink color, rather
than Orange. Works for me.
Please Email Me if you have any
questions or comments