 #1
#117 Dec, 2003
Having finally finished the Bigsby Tele, it is time to start the next project. I am calling this one the Koa Caster. I figure 6+ months to finish this one.
So far, all I know is that it will be a Koa topped Mahogany body, with a belly cut. Standard Tele shape & neck pocket, rear routed. Two HBs and a hardtail strat bridge. But I think that the neck PUP will actually be a P-90 in an HB chassis. Gibson makes one, SD, Rio Grande, and I am sure others also make one. Bridge PUP will likely be another Gibson BurstBucker, because I like them.
Maple neck with Rosewood fretboard. Locking Schaller style tuners. Truss rod accessible at the nut. This time I will probably use a standard width instead of my normal 1.75" width.
Color of hardware? Not decided. I think that I will get the body & neck done, and then choose the colors.
Pickguard? If I do one, clear plexi.
********************************************************
22 Dec, 2003
The above was written under the influence of narcotics, cough syrup to be specific. So if it seems goofy, there is a reason.
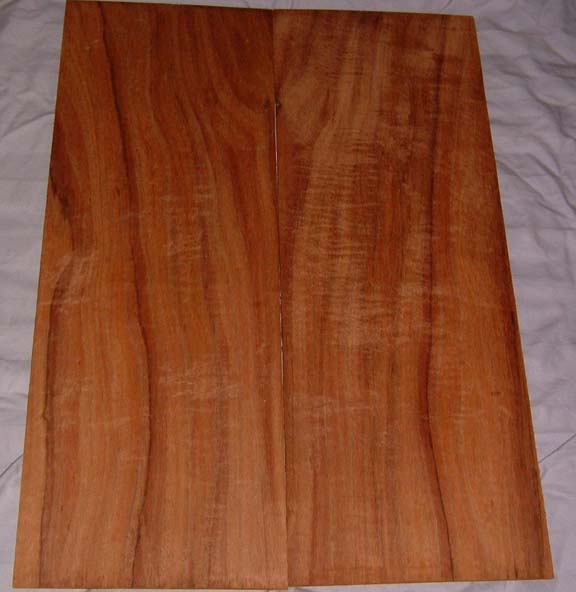
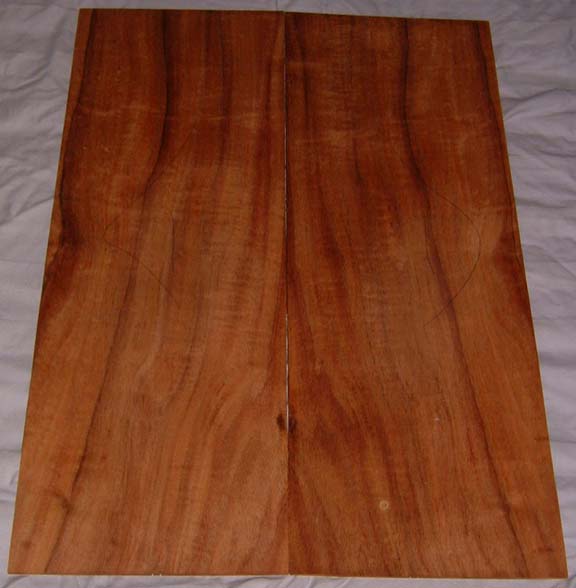
The other day, I received the Koa top I am going to put on this guitar. Here are the pix. I am not sure how I am going to match the wood. There are 4 choices, so we shall see. I have included pix of all 4 choices.
#1
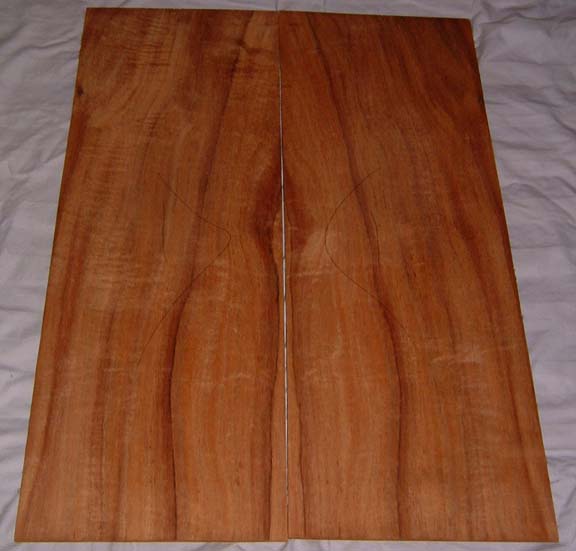 #2
#2
 #3
#3
 #4
#4
We shall see.....
The folks at Rio Grande PUPs offer PUP mounting rings in various colors. Including dark tortiseshell. I can even get the PUPs finished that way if I want.
********************************************************
2 Aug, 2004
In a flash of brilliance, or maybe insanity, I saw things clearly for a minute or two. Here is my current plan. For today. At least for this moment. I will have the guitar routed for 3 HB's. But I will put HB's in only the middle and neck holes. I will put a dummy of some sort in the bridge hole. This way, if I change my mind on the number or location of the PUPs, I only need to throw away away the strings and maybe the pots and switch. If I want to, I can put in all 3 PUPs and put in a Strat switch. And since it will be rear routed, I can even put other buttons and what not if I want to. I won't, but what the heck.
The only thing that I am not sure of, at this point, is a maple neck or mahogany neck?


********************************************************
25 Aug, 2004
Well, some final decisions have been made. Finally.
This will be a double cut Tele (modeled on the DaisyRocks Stardust), a neck and middle HB, rear routed, Tele switching, mape and striped ebony neck with Schaller tuners, locking because I now hate non locking tuners, and a Bigsby with a Schaller TOM (allparts model GB0590.) A bit of miscellaneous stuff that I learned along the way: The post holes are 7mm and the spacing is 75mm. Also, the holes on the Bigsby B5 and the licensed B50 are not always in the same locations. And the neck pocket will be angled. Double bound with tortoise shell. Yee-Hah!.
********************************************************
20 Oct, 2004
The body and neck came yesterday. Look at the pix. I love the body.


I learned something in this process that should have been obvious. When a piece of wood is put into the CNC machine, an "index" hole is made, so that the CNC machine can "find itself" on the wood. Makes sense. Except that, with no bridge PUP, something had to fill the index hole. So I used a piece of the gold MOP left over from the neck. And the folks at USACG drilled a string ground hole from the TOM mounting hole for me. It is hard to find even in real life.
The one thing that I want to do color wise is tint the neck, which is maple, to a mahogany-ish color. Fabgear suggested that I start with brown, red, and yellow dyes and work from there. So I will take his advice and do just that. Fortunately, I have some scrap woods that I can use to practice on.
All I am going to do with the body is sand and finish. No dyes or colors are called for.
********************************************************
22 Oct, 20 04
Yesterday I sprayed the body with S&S, and I dyed and sprayed nitro on the neck. Today, a thicker coat of nitro, and in both cases I have some runs that I need to take care of. If the weather holds, I will spray next week, otherwise it could be a while. But I love the look of the body and neck so far.
For the neck dye, I used some alchohol dyes from LMII. I wanted a fairly thick and heavy color, and a mahogany-ish color. I got both. The mix is brown and red, no yellow.
********************************************************
27 Oct, 2004
I ordered the parts today. Gibson burstbucker, Seymour Duncan version of the P-94. Schaller rollerbridge. Roller string tree. Gold knobs with tortoise shell inserts. HB mounting rings from Rio Grande, also in tortoise shell to go with the binding. Sperzel locking tuners. Jack cup and neck plate. Everything in gold, except the tortoise shell.
And at the moment, the body and neck are drying. They will drying for at least 2 weeks, maybe more. Depends on my mood and time available.
********************************************************
17 Nov, 2004
I finally got all of the parts, sort of, and started putting this bad boy together. Here is a photo log of how it went. It is somewhat incomplete. But, what the heck.
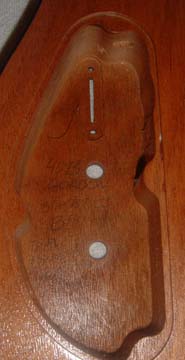
In the photo below, you can see some writing on the bottom of the control route. That is the notes telling the shop guys what to do. It is a bit hard to read, but is pretty much says neck and middle HB, no bridge PUP. TOM and B5.
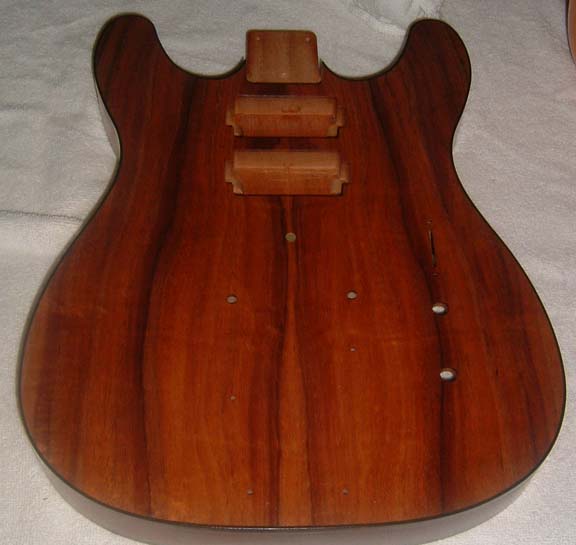
The body with nothing on it, and nothing done to it other than a nice coat of Nitrocellulose.
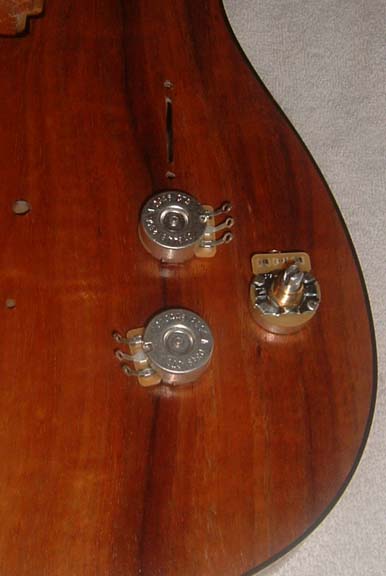
Where the pots will go. The upside down one is the tone pot.
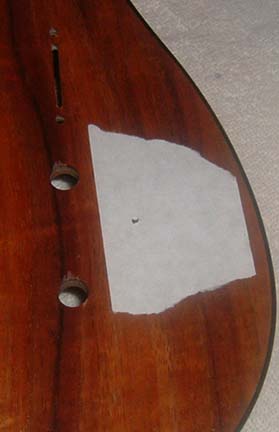
The pilot or starter hole. The tape helps keep the wood and nitro from breaking up.
All the holes drilled. Actually, I only did the hole for the tone pot. USACG did the others.
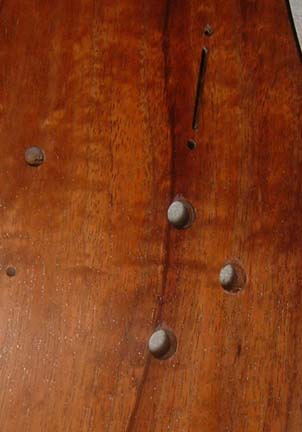
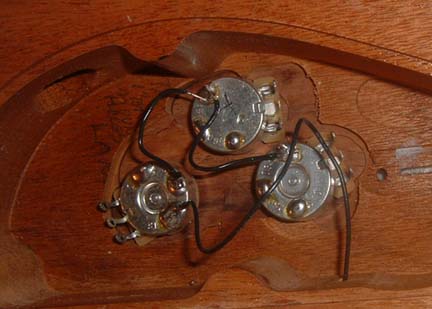
I decided to put some solder pools on the pots before inserting them into the body. Glad I did. It worked out very well and saved some time and cussing.
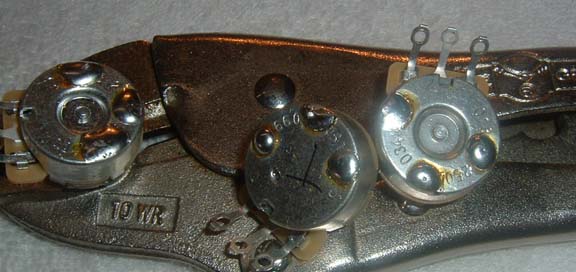
The three pots installed. This is about when I realized that I had everything that I needed except the switch. ARGH! and other bad words. So back down to the store and pick up a switch I go.
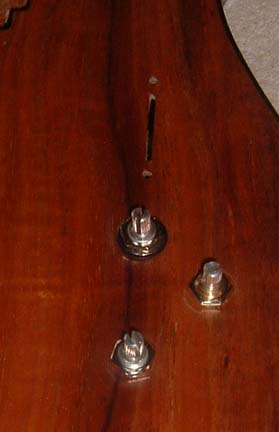
This is just the grounding wires and string ground, before the PUPs and the switch add to the mess.
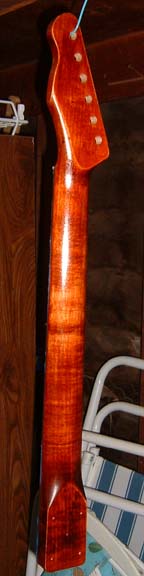
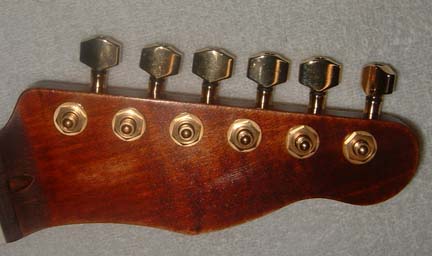
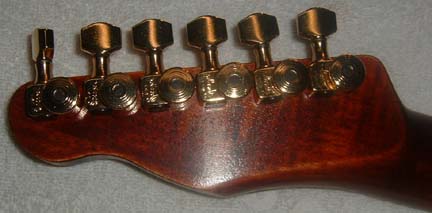
Head stock front and back. I did NOT drill all the way through the head stock this time, the way that I normally do. Yee-Hah.
The PUPs and the inlay over the index point where the bridge PUP would normally be.
![]()
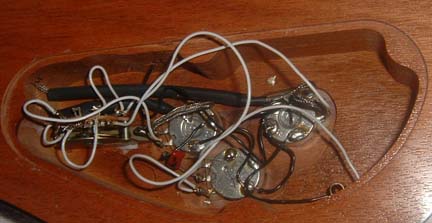
The control route, PUPs but no switch or jack.
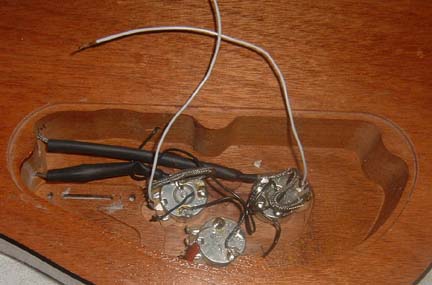
I have now added the switch and jack. Note the shrink wrap on the wires. Gibson does things so that the ground is fully exposed. The shrink wrap insulates it and prevents problems.
Pots and switch.
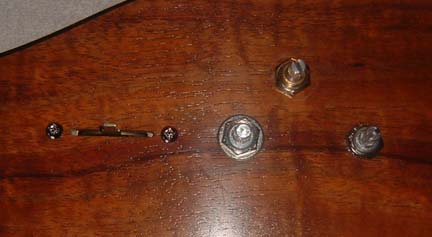
With the neck on, and lots of little things left to do. Bridge, tail piece, knobs on the pots, strings.
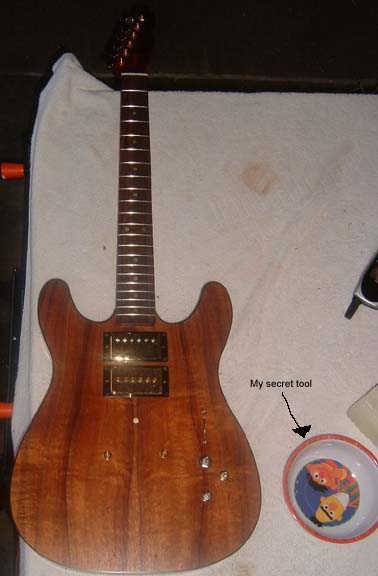
Still no strings. But it PLAYS. I did not do my other normal FUBAR. I did not wire the jack backwards. The guitar is currently at the luthier getting a set up done. There are some detail things I still should not do. But there will be real photo's coming.

********************************************************
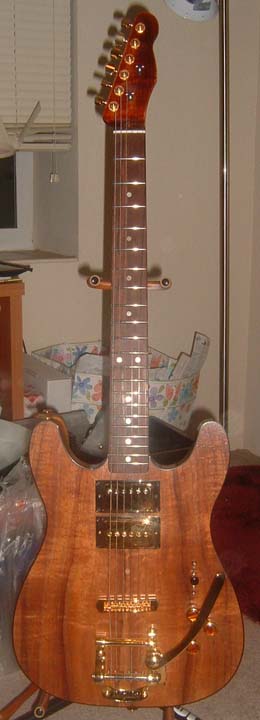
18 Nov 2004
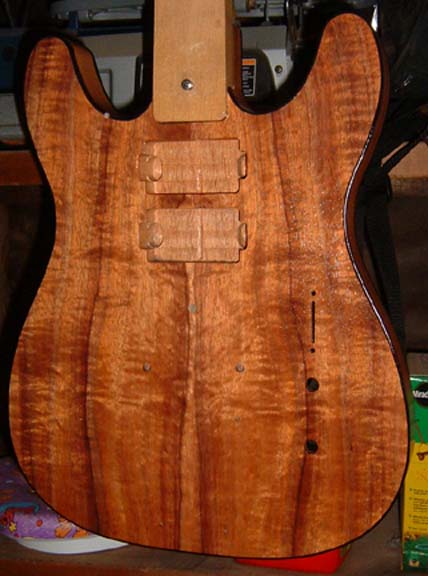
It's done. Here is the proof
Other lessons learned:
Water based dyes disappear from the lawn faster than alchohol based dyes do.
If it is chilly, nitro does not dry as fast as in the summer. Adjust accordingly.
The Schaller type locking strap locks are easier to install than the Dunlop version.