Hybrid Bass 1


Aug. 26, 2008


This is my first bass project.  I am calling it a “hybrid” because it contains some parts from G&L, and some parts that I am sourcing elsewhere.


The bridge, pickups, and tuners are from G&L.  The body & neck are from USA Custom Guitars


The pickups are the same pups that are in the SB-2.  The body that I am using is a “Tele” style body with a “Jazz” style neck.  The body is alder and routed for “P” and “Jazz” pups.


As will be seen, there are some challenges.  There will be plenty, I am sure.


  1. 1)  The body is routed for a standard Fender bridge, because I did not get the body from G&L.  I knew this and I will deal with it.

  2. 2)  The bridge pup shape/design is not exactly the same as a Fender Jazz pup.  I did not realize this, but again, I can and will deal with it.


I want to say a big THANKS to Dave from G&L for helping me with the G&L parts.


The body top & bottom.


I will be finishing the body in black nitro, both sides.  The neck attaches via a standard Fender neck plate.


I will have to route for the saddle lock bridge, the bridge pup, and drill holes for the controls.

Bridge & nut with string.  I used a bunch of washers for weight.  All they had to do was pull the string taut.  I did not need lots of weight on there.  They worked perfectly.

In this pic you can tell that the bridge pup is wider than a normal jazz pup.  It is also wider as measured from neck to bridge.  I got these pups because I really like the MFD pups, and I am happy to do the work.   The “P” style pup fits just right.

As you can see, the neck has no face dots.  This is intentional.  I am going to make the guitar as black as possible.  Meaning that I will probably paint the whole neck black as well.  With nitro.


But I think that I will leave the chrome parts chrome, for contrast.

Sorry about the angle of the pic with the body, bridge, & pups.  It just worked out that way.


Aug 29, 2008


I attached the neck, put in the pup covers and got out the bridge and started arranging things.


The first thing I had to do was measure again from the nut to the front end of the bridge.  That went well.

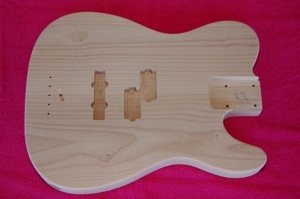
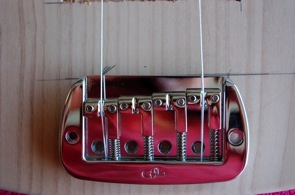
One of the issues that I have to deal with, that I knew I would have to deal with, is installing the bridge.  After, the saddle lock bridge is a G&L only type of thing, and I did not get the body from G&L.


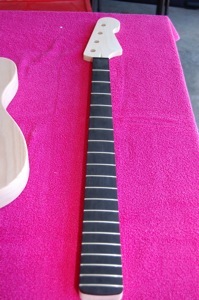
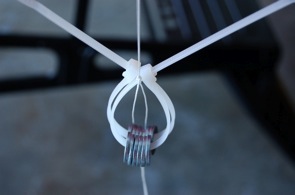
So what I am going to do is this.  Install the neck and the nut.  Take a very long piece of string and run it through the bridge, over the nut, and through the tuner holes, and then tying the ends of the string together.  Adding a few ounces of weight to the string at the end of the neck will pull the string taut enough to see where it runs.


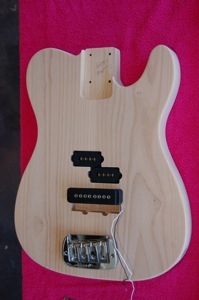
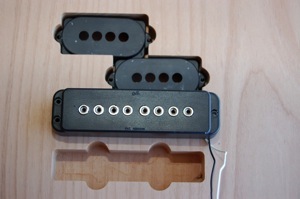
Next, insert the pup covers from the middle pup so that I can see where the string runs over the pups.  By moving the bridge back & forth, I can see where the bridge aligns relative to the neck & pups.


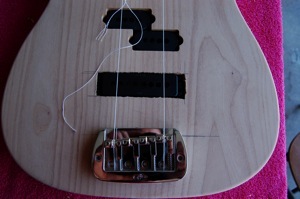
The next thing to do is measure from the nut to the front edge of the bridge on my ASAT bass.  This will tell me how to align the bridge relative to the nut. 


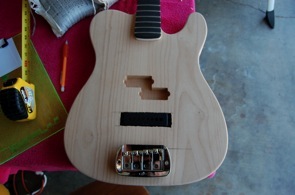
Get everything aligned properly, then press the bridge into the wood.  This will make an indentation showing me where I need to route for the bridge protrusion.  Route it out, fill the screw holes if needed, and then mount the bridge.


This should work.  Hopefully it will.


Aug. 27, 2008


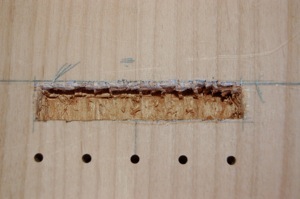
The first thing that I am going to work on is the bridge pup.  According to my measuring tool, the routed slot is 4 & 3/4” wide by  3/4” tall.  The pup is 4 & 1/8” wide by 1 & 1/8” tall.  That means that the total difference in 3/8”.   So to keep the pickup where it is, I need to remove 3/16” from each of the four sides. 


The measuring tool says 3/16”, the eye says 1/8”, so I marked 1/8” also and will try that first.  The pup says 3/16”.  So be it.


Aug. 28, 2008


On my ASAT bass, the distance from the nut to the leading edge of the bridge is 33 & 1/2”.  It is supposed to be really hot today, so I will probably not do any more work today.  I just wanted to make sure that every thing fit.  And it does.

The string runs right over the pups and up the edge of the neck.  Going over the pups the string is just a touch, maybe 2 mm, to the right.  No big deal.  But it is the same on both sides of the neck.  And I think the front edge of the bridge is a touch out of square, maybe 1 or 2 degrees.  I think that trying to fix it will make things worse, not better.


BTW: If you think my chisel work is bad, you should see me trying to free hand with a router.


What I did on this one is I drilled out the center first, then I started chiseling.  It gave the wood someplace to go, so that it would not split the body.

I routed out the hole for the lip of the bridge using a chisel.