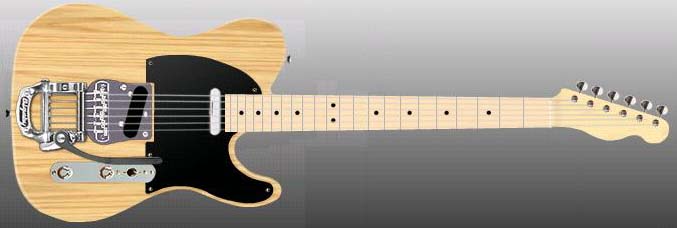
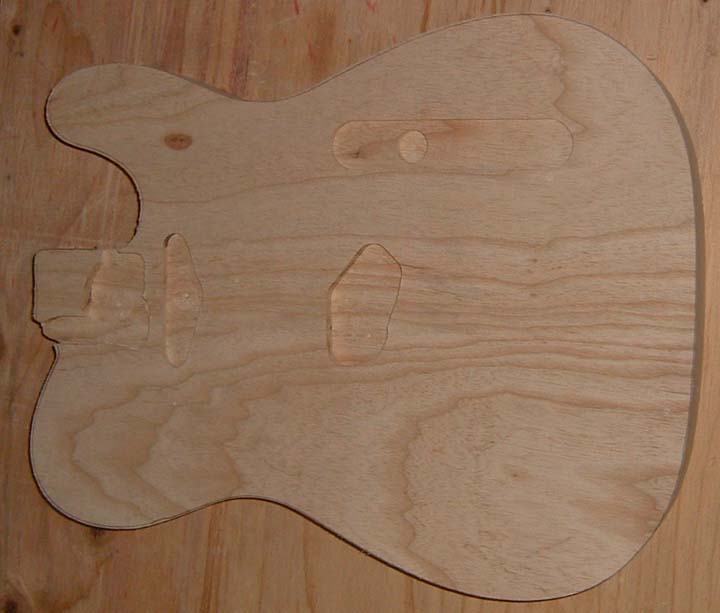
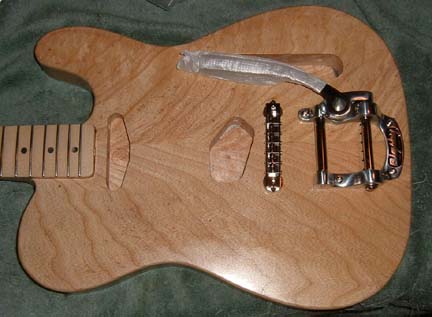
Welcome to my newest guitar project. This will be a fairly standard Tele with a Bigsby added, because I like them. And this is what I want it to look like.
***************************************************************************
5 Sept, 2003
So far, I have the body (1 piece ash), the pickups, the nitro & dye, the tuners, and the nut in hand. I will pick up the Bigsby, bridge, & plate this afternoon.
I am going to dye this Tele a vintage amber, including the neck. Then I will spray with nitro.
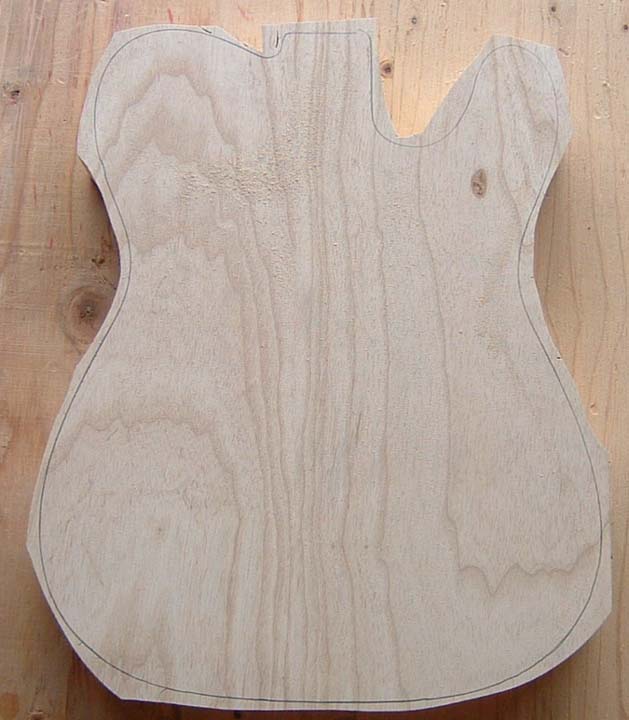
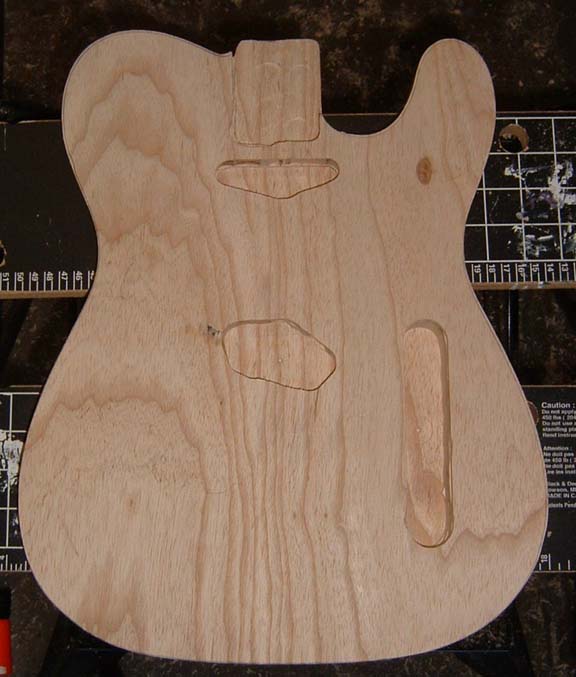
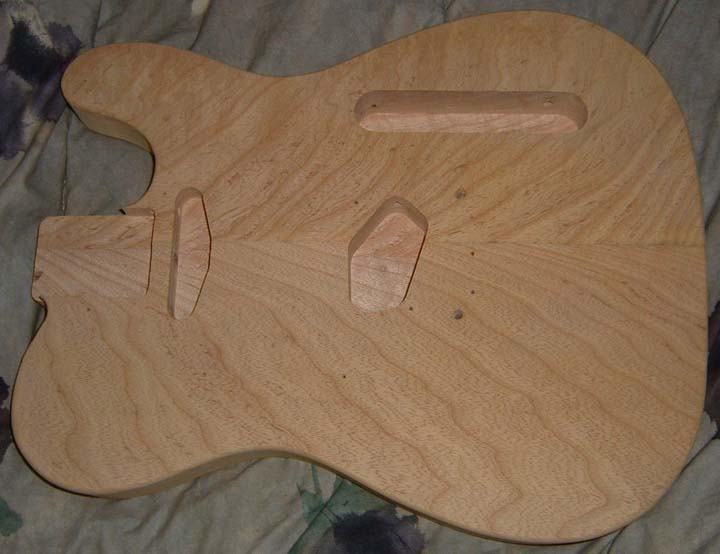
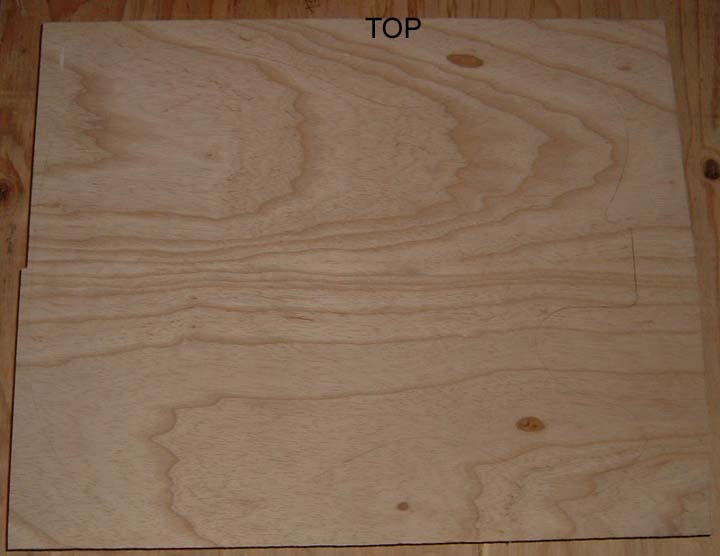 This is the top/front of the body, uncut. If you look closely you can see the
outline of the body. The body came flat and level. On the horn is a knot,
which will be behind the pickguard. Yes, I am putting a pickguard on this one.
This is the top/front of the body, uncut. If you look closely you can see the
outline of the body. The body came flat and level. On the horn is a knot,
which will be behind the pickguard. Yes, I am putting a pickguard on this one.
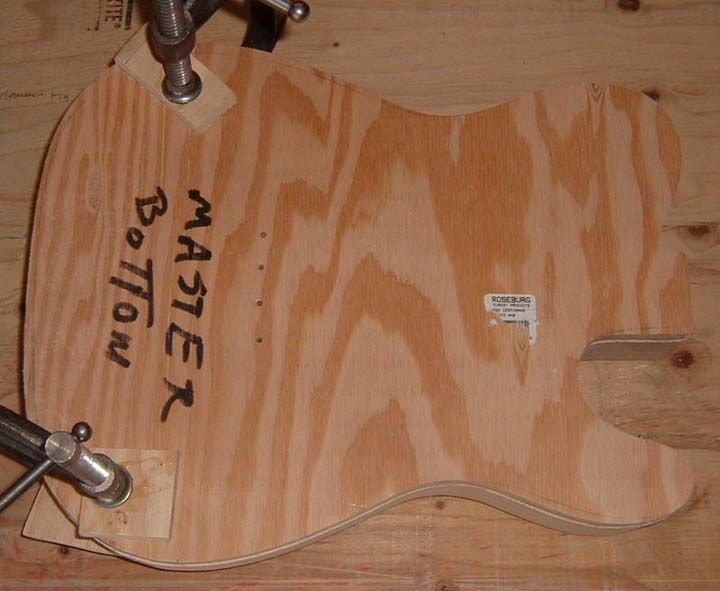
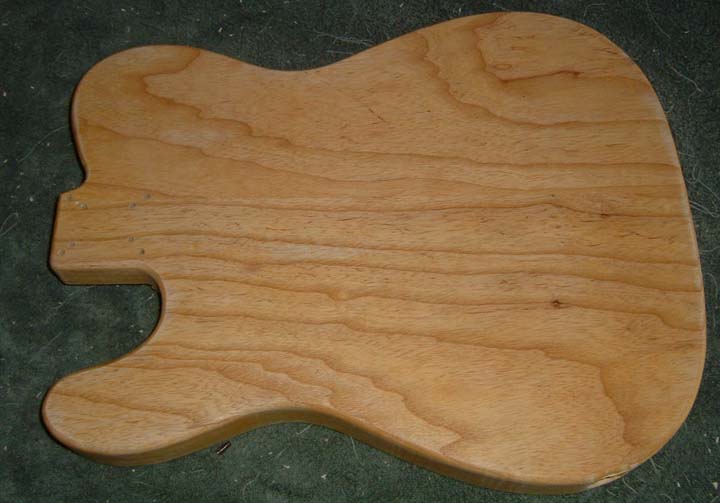
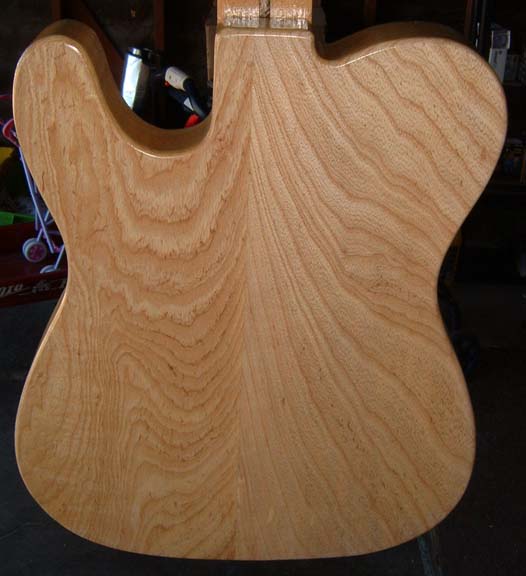
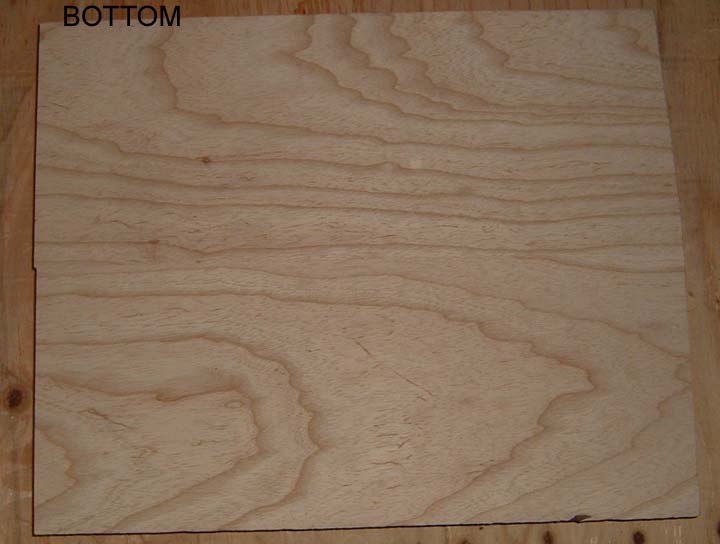 This will be the back of the guitar.
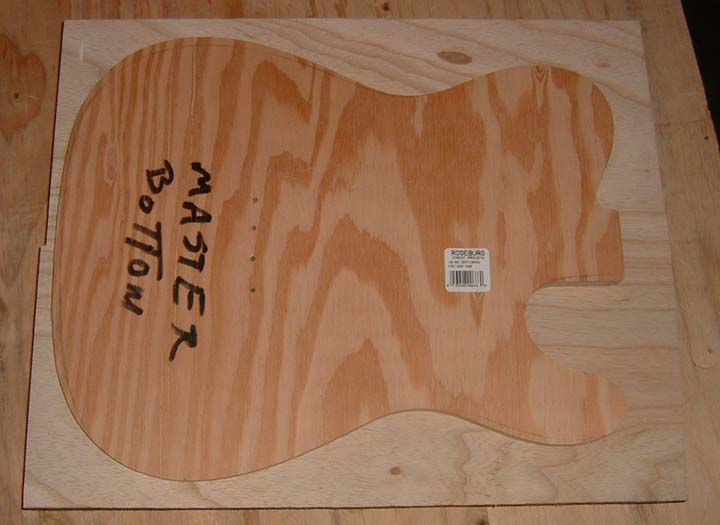 This is my template laid over the body.
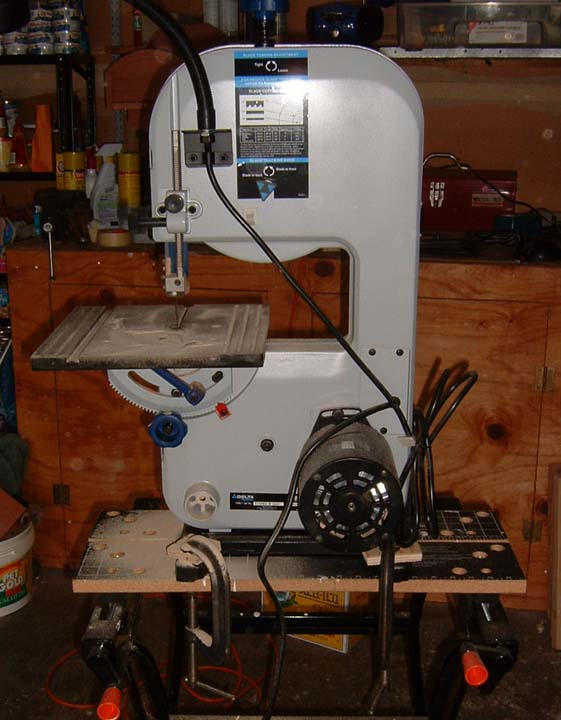 I recently bought this 9" bandsaw for another project, and I can use it here
as well. Because my workbench is a bit high, I did not want to bolt the saw to the
workbench, so I put it on my work mate. But it was a bit unstable, so I clamped it
down. Now it is stable.
I recently bought this 9" bandsaw for another project, and I can use it here
as well. Because my workbench is a bit high, I did not want to bolt the saw to the
workbench, so I put it on my work mate. But it was a bit unstable, so I clamped it
down. Now it is stable.
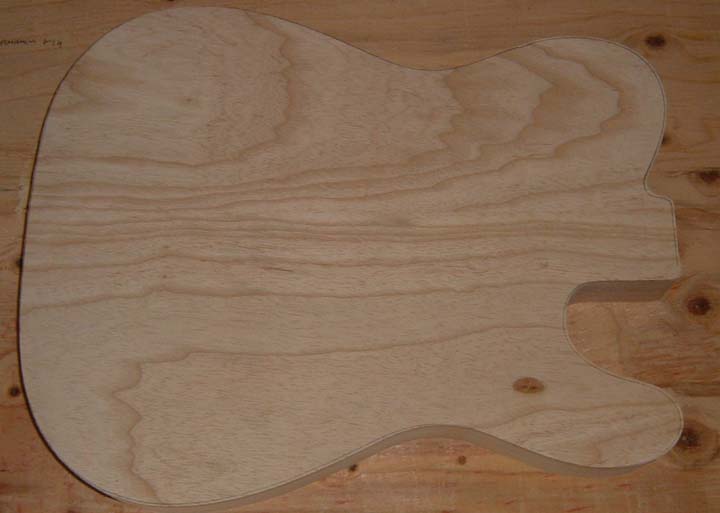
 After the rough cut.
***************************************************************************
6 Sept, 2003
 After I took the router to things, this is what it looks like. There is a bit
of overhang, and that is because of the bit/guide combination. It leaves about
1/8" overhang. There may be away around that, I am not sure yet.
After I took the router to things, this is what it looks like. There is a bit
of overhang, and that is because of the bit/guide combination. It leaves about
1/8" overhang. There may be away around that, I am not sure yet.
 With the template removed.
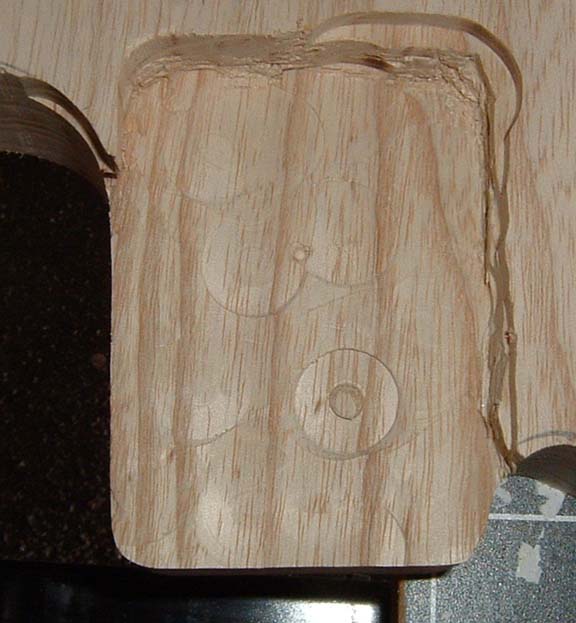
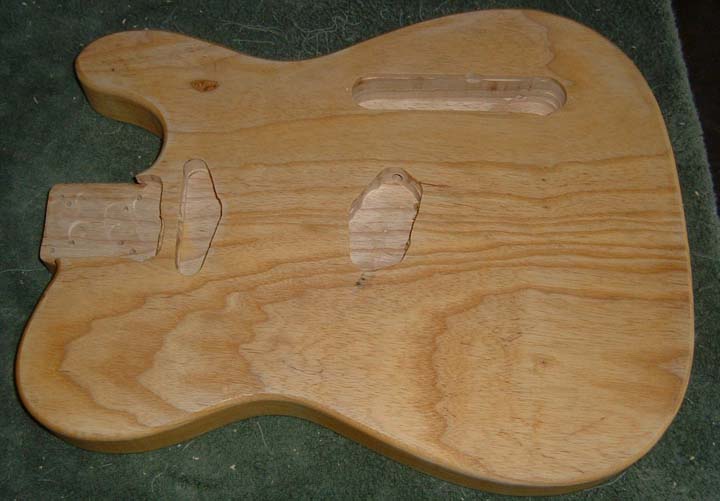
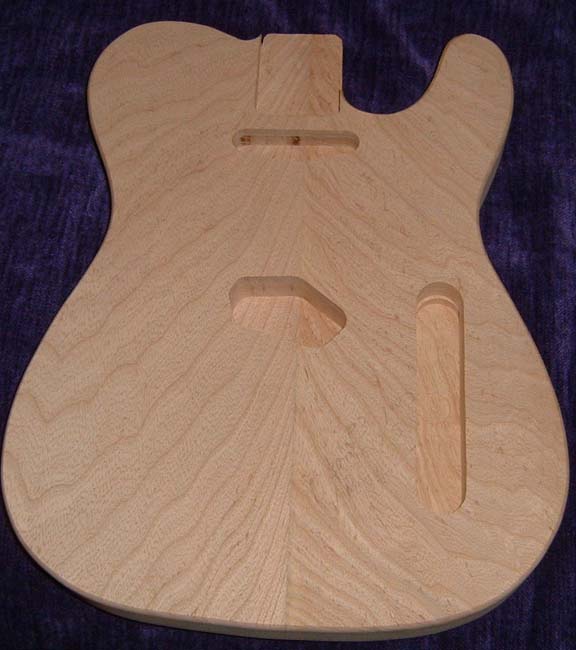
 After doing the initial route on the control cavity, neck pocket, and PUP cavities.
Note that the control cavity is perfect, the neck is hosed, and the PUPs almost
perfect. I did the control cavity, and then set the router down on its side to
reposition everything. Somehow, the bit depth got changed and the bit ate into
the template. I think that it is still salvageable, so I will try. If not, I
will try again.
After doing the initial route on the control cavity, neck pocket, and PUP cavities.
Note that the control cavity is perfect, the neck is hosed, and the PUPs almost
perfect. I did the control cavity, and then set the router down on its side to
reposition everything. Somehow, the bit depth got changed and the bit ate into
the template. I think that it is still salvageable, so I will try. If not, I
will try again.
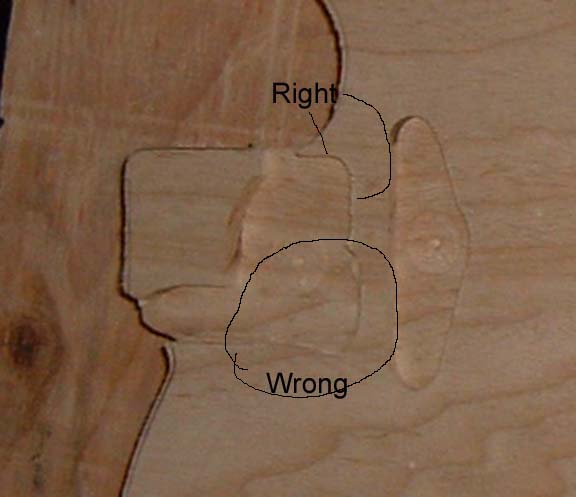 Neck cavity close up.
***************************************************************************
8 Sept, 2003
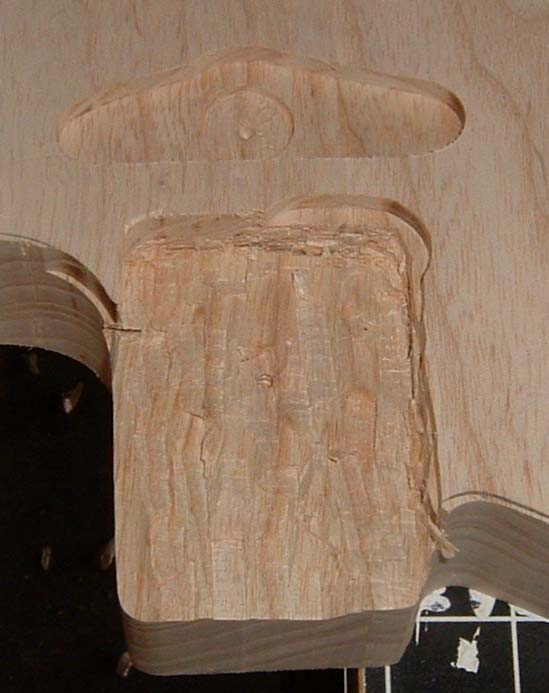 After a bit of chiseling, this is what the neck pocket looks like. (See above
for the before chiseling view.) The neck fits so-so, and the big knob in the middle of
things is gone.
After a bit of chiseling, this is what the neck pocket looks like. (See above
for the before chiseling view.) The neck fits so-so, and the big knob in the middle of
things is gone.
 Next I took out the router and got the most of the neck pocket flat, while staying
away from the sides of the neck pocket. That will be done by hand with the chisel.
Next I took out the router and got the most of the neck pocket flat, while staying
away from the sides of the neck pocket. That will be done by hand with the chisel.
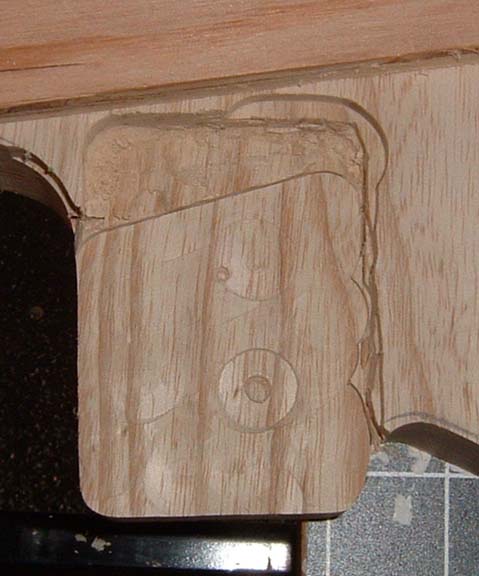
 And this is what it looks like after a bit of chiseling and very careful routing up
to the sides of the neck cavity. A little more chiseling will be required to fine
tune the fit, but this ain't half bad.
And this is what it looks like after a bit of chiseling and very careful routing up
to the sides of the neck cavity. A little more chiseling will be required to fine
tune the fit, but this ain't half bad.
Next step is to route the PUPs and control cavity.
I have found out what the problem is, I think. The way that this bit works, there is a collar holding down the bearing. And if the collar comes loose and floats up, then the bearing floats up also. And that is what has been happening. So I did do things correctly on the neck cavity.
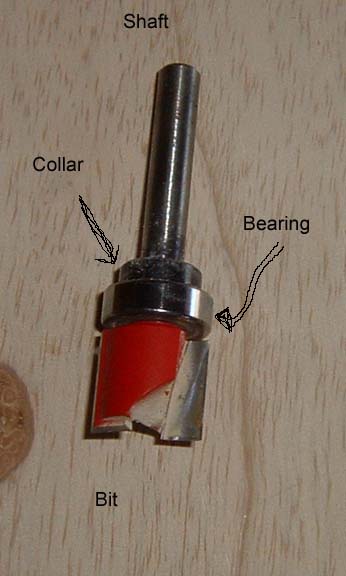 This is the bit. It takes a hex wrench, and of course I don't have the proper
size. But I found that if I limit the pressure against the side of the cavity, it
does not ride up. So all can be good.
This is the bit. It takes a hex wrench, and of course I don't have the proper
size. But I found that if I limit the pressure against the side of the cavity, it
does not ride up. So all can be good.
 The bridge pup and control cavities. Not final depth. The little
boo-boo on the edge of the control cavity was from lifting the router at an angle.
The bridge pup and control cavities. Not final depth. The little
boo-boo on the edge of the control cavity was from lifting the router at an angle.
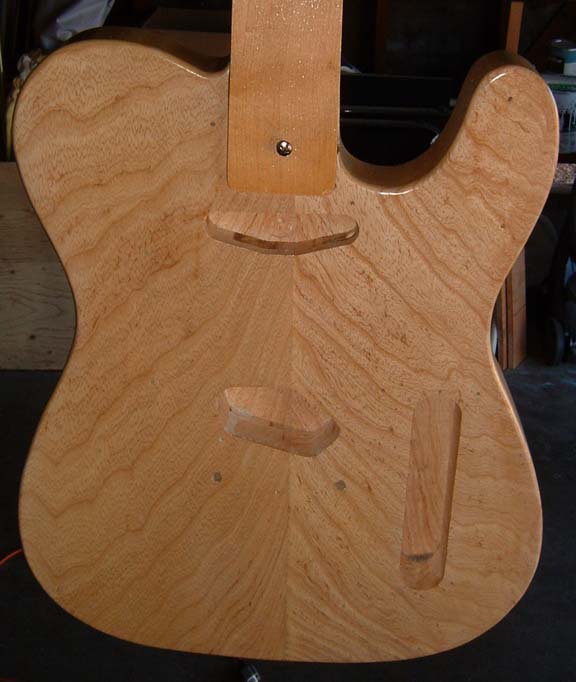
 The neck cavity and bridge cavity. Both final depth. You can see where
the bearing rode up. I ended up digging into the body a bit, kind of like a cave,
but it is hidden under the top. Whew.
The neck cavity and bridge cavity. Both final depth. You can see where
the bearing rode up. I ended up digging into the body a bit, kind of like a cave,
but it is hidden under the top. Whew.
Misc. details. The neck pocket and neck PUP cavities are 5/8" deep each. The bridge PUP cavity is 3/4" deep. And the control cavity is 1.5" deep.
 Now all of the cavities are the correct depth. I have drilled the holes from
the PUPs to the control cavities. I have only one set of holes left to drill and
that is for the jack. And of course the PUPs and what not. But the rest is
sanding and finishing. Assuming that everything is straight. We shall see.
Now all of the cavities are the correct depth. I have drilled the holes from
the PUPs to the control cavities. I have only one set of holes left to drill and
that is for the jack. And of course the PUPs and what not. But the rest is
sanding and finishing. Assuming that everything is straight. We shall see.
**************************************************************************
10 Sept, 2003
I did not work on the body today, but I did try fitting a few things, and it was all good news.
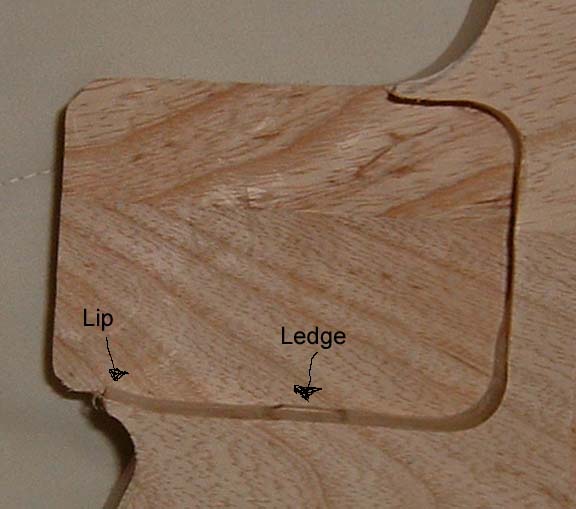
First, the neck pocket that I fashioned is tight, and is positioned correctly for the bridge. This was a big concern. The second thing that I learned is that when mounting the neck PUP to the pickguard, you use springs rather than the plastic tube stuff. The next thing that I learned is that the studs for the bridge that I am using need a 1/4" hole. The stud fits securely, but does not need to be pounded in. It will come out by hand, but it is not easy.
Yea!
***************************************************************************
11 Sept, 2003
My wife and I had an interesting discussion last night, relative to Sep 11, 2001. What are we going to tell our daughter, who was 4 months old at the time, about this event and how it has affected us, the world, and its impact on her? Another interesting point came up: In neither case have our parents discussed the killing of JFK or RFK, equally shocking events in their lives. Hhhhmmm....
Today I put the guitar to the orbital sander. I have used this a tool for another project that I did for my daughter. I learned alot about what NOT to do with an orbital sander. And I learned a bit about what TO do, which I used today. The secret is light steady pressure, and to feed the wood into the sander at a shallow angle. Takes some time, but does not mess anything up. Also, I needed a 1/2" sanding drum for a few tight spaces. So down to HomeDepot I went.
For all the mistakes I make and what not, someday I may be a competent luthier.
****************************************************************************
15 Sept, 2003
I settled on a few things today. 1) My first try at mixing dye's ended up with the color that I wanted for the body and the neck. This time I got lucky. Usually not the case. I saved the larger pieces from when I trimmed the board into something vaguely resembling a guitar, and this was my practice wood. 2) The other thing that I decided is that I am going to put in a belly cut, starting with a sureform tool. Then sand paper. Then more sand paper. I will use my FMT as my model for how much to remove from where.
****************************************************************************
18 Sept, 2003
Yesterday and today I put the pots and the switch in the control plate, and did all of the soldering that I can at this point.
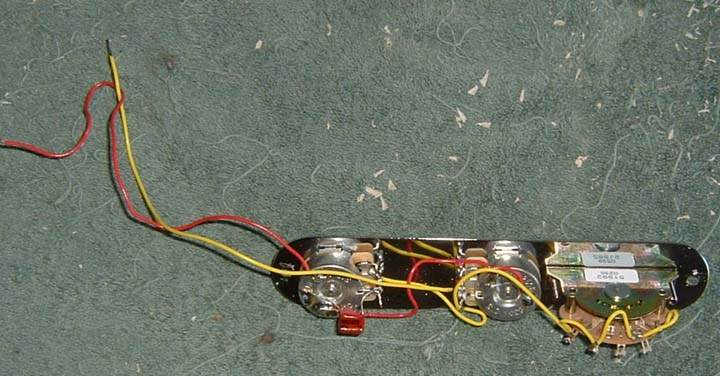 I did one goofy thing, and that is that I used yellow for hot and red for ground.
It was just the wire that I had available, so I used it.
I did one goofy thing, and that is that I used yellow for hot and red for ground.
It was just the wire that I had available, so I used it.
Today I drilled the holes for the control plate, the strap locks, and the jack hole. I also started the finish sanding. I did change one thought, before I screwed anything up, and I did not do a belly cut.
At the moment, I have all the stuff I need except two items: The neck and the pickguard. Both have been ordered and are on their respective ways.
****************************************************************************
19 Sept, 2003
I rounded the edges of the guitar with a 1/4" round bit. I learned a couple of lessons on this stage: 1) Drill the jack hole after rounding the edges because the bearing will try and go into the hole. 2) Do this before final sanding as the router will leave small marks on the wood. 3) PRACTICE on a piece of scrap wood for the proper depth first. Or you could end up with a bit of a carved top guitar. (I did not make this mistake this time.)
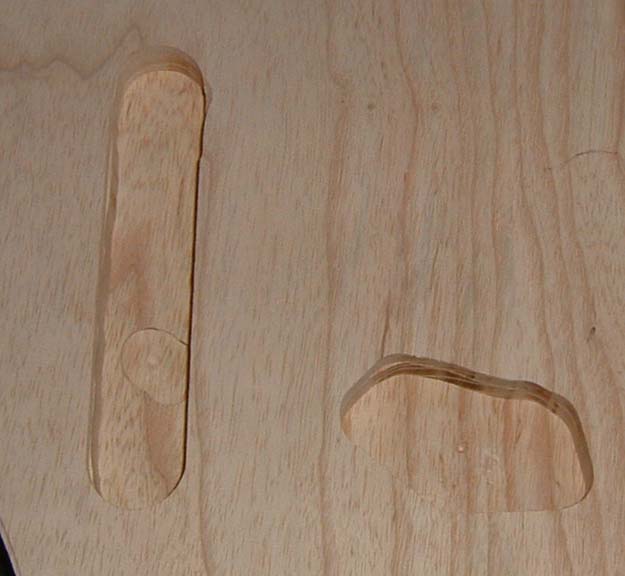
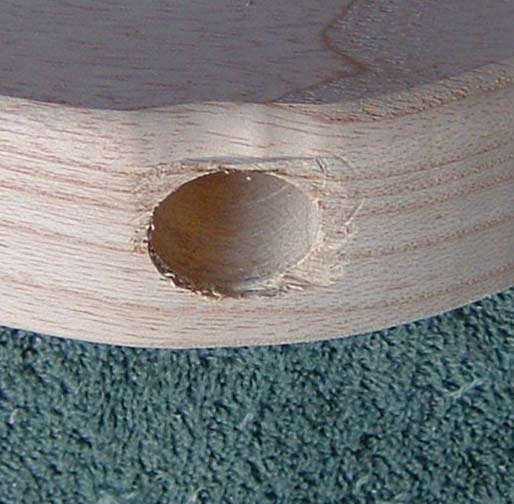 This is what happens when the bearing tries to go into the jack hole. Not a
biggie, but annoying enough.
This is what happens when the bearing tries to go into the jack hole. Not a
biggie, but annoying enough.
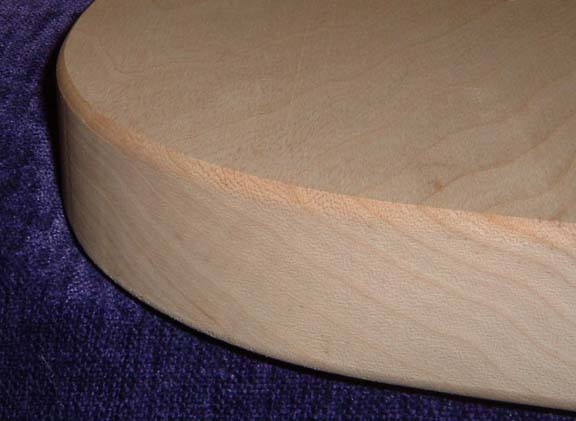
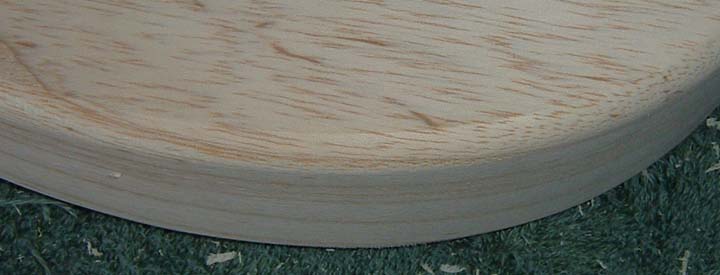 This is a properly rounded edge.
****************************************************************************
22 Sept, 2003
In a flash, something that my luthier said the other day sank in. I have been connecting my necks to my bodies all wrong. I have not been using the neck plate because I thought that it merely covered the screws that held the neck on. Not so!!!!! That plate is an integral stiffening feature. D'oh!
*****************************************************************************
24 Sept, 2003
I have since mounted all of the necks properly, now that I understand.
On the Bigby Tele, today I applied the grain filler. Kind of dirty work, but not really. This is an alternative to their spray sanding block/sealer, because I just put nitro over it and everything is groovy.
In reality, the color is little more yellow than this, not so much brown. It is also a little more "faded," kind of like Gibson faded cherry color.
 Front
Front
 Back
Back
I got the pickguard today. Tomorrow, I will fit the PUP into it and fit it to the body, drill, etc. Hopefully it all fits.
******************************************************************************
2 Oct, 2003
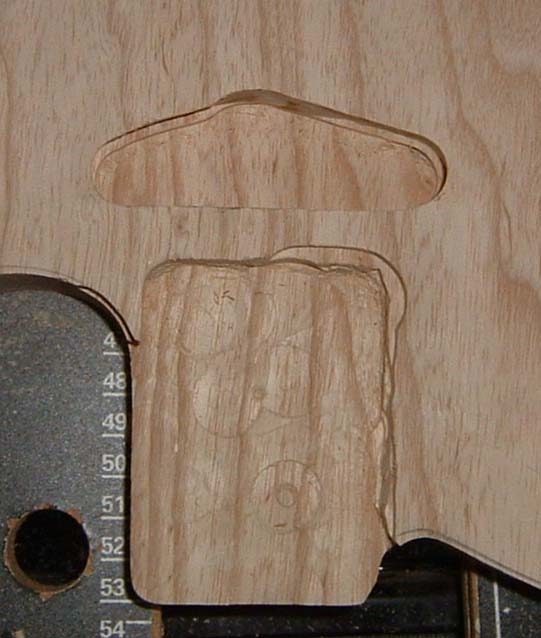
I put everything together and did not like the way it all fit. There is extra space around the neck in the pocket, the control pocket is at an angle, and the PUP holes are just wrong. So I am not going to use this body for this project. Instead I took out my sure form tool and put in a belly cut. I think that I will finish this guitar off as an eBay "special." (Click here to see the BeatCaster.) In the process of doing a new body I also made new templates. The results are obvious below.
 The belly cut on what is now the BeatCaster body. I put a forearm cut in it
also, but that pic is in the BeatCaster
section.
The belly cut on what is now the BeatCaster body. I put a forearm cut in it
also, but that pic is in the BeatCaster
section.
This week I got the new body and my neck.
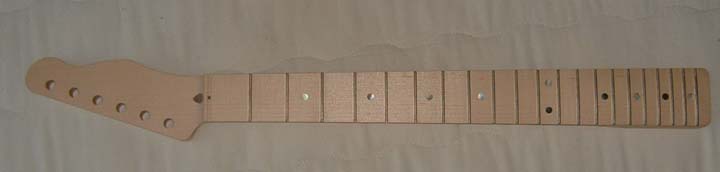 Unfinished maple, with the truss rod adjustment at the heel.
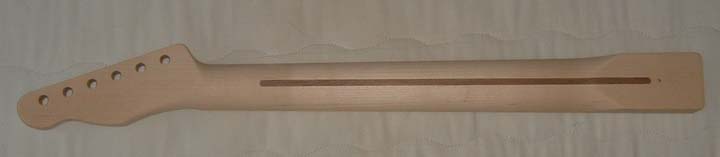 Walnut stripe. I am going to spray this puppy with nitro.
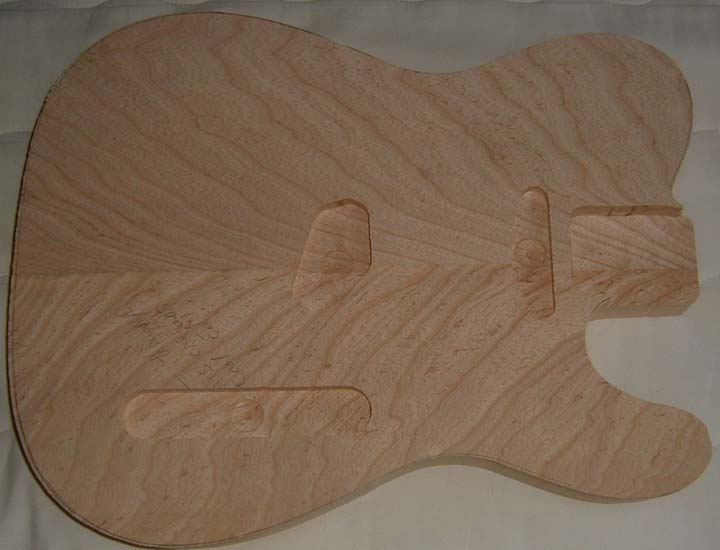 This is the new body with all of the major holes started. Still ash.
The only thing that is full depth is the neck pocket.
This is the new body with all of the major holes started. Still ash.
The only thing that is full depth is the neck pocket.
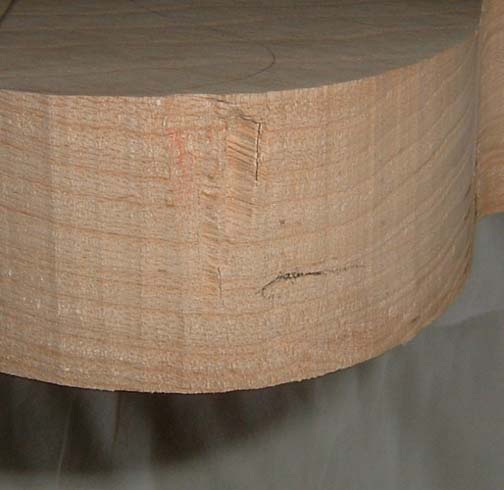
I had some problems with the new body also. But they are cosmetic, not functional. I can work with these. Most or all of this will come out with the orbital sander. This little problem is caused by the router grabbing at the wrong angle. Oh well.

 A little bit of very light chiseling and the neck will fit just fine. I have
faith this time.
A little bit of very light chiseling and the neck will fit just fine. I have
faith this time.
*************************************************************************
20 Oct, 2003
 The body with the holes all full depth. The only thing that I have not done
is drill/route the path for the wires to run in.
The body with the holes all full depth. The only thing that I have not done
is drill/route the path for the wires to run in.
 The edge rounded. I still need a little sand paper, but I can deal with that.
What do I have left to do with the body:
**************************************************************************
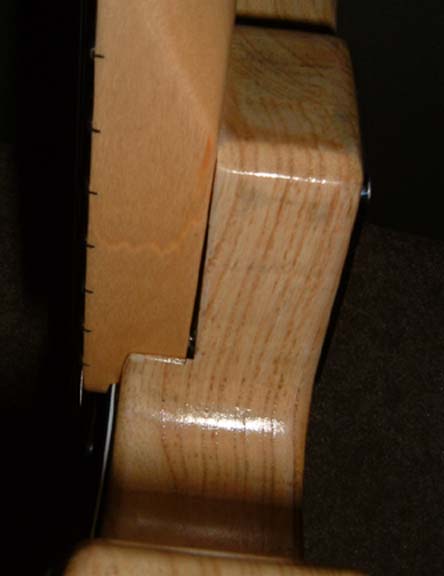
21 Oct, 2003
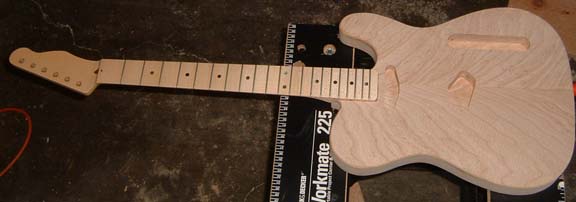 The body and neck together for the first time, ever. I also routed the holes
for the wires today.
The body and neck together for the first time, ever. I also routed the holes
for the wires today.
**************************************************************************
22 Oct, 2003
Today I did my rough fit. Turned that I had not routed the control pocket deep enough. I fixed that problem. So all I need to do now is wait for the neck to dry (2 weeks time) and then I can put the neck on and do my final sizing/locating. Before then I will start the sanding process.
**************************************************************************
23 Oct, 2003
Well, I cheated. I used the neck for the BeatCaster to help me with lining up the BigsbyTele. In the process I cut my finger, probably removing a drill bit by the bit, and got some blood on the body. First time for that.
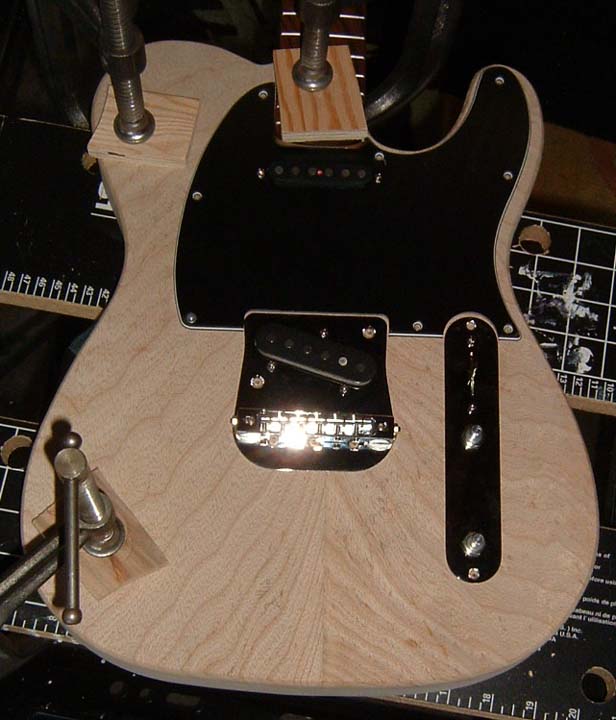 With neck and hardware. The only things not drilled are: The bigsby itself,
the strap locks, and the jack plate. I apologize for the blinding flash, but when you work
with chrome.........
With neck and hardware. The only things not drilled are: The bigsby itself,
the strap locks, and the jack plate. I apologize for the blinding flash, but when you work
with chrome.........
After the drilling and locating, I started the sanding process. I took it down to 400 grit sandpaper, and applied my dye. Being a waterbased dye, it will also pop the grain. (Oil/alchohol based dyes do not pop the grain.) I think that the dye is too thin colorwise, so I will darken it over time, to get the color that I want.
**************************************************************************
24 Oct, 2003
 OK. After applying a thin yellow water based dye and grain/pore sealer, this
is what it looks like. I learned an important lesson here. The best way to
sand down the sealer is to use waterproof 400 grit paper, and some water. Otherwise
the sandpaper loads up and heats up and starts scratching things. Not good.
The sealer needs 24 hours or more before spraying nitro, so on Monday....... I shoot.
OK. After applying a thin yellow water based dye and grain/pore sealer, this
is what it looks like. I learned an important lesson here. The best way to
sand down the sealer is to use waterproof 400 grit paper, and some water. Otherwise
the sandpaper loads up and heats up and starts scratching things. Not good.
The sealer needs 24 hours or more before spraying nitro, so on Monday....... I shoot.
**************************************************************************
28 Oct, 2003
I want to apologize for the slightly weird angle of the photos, but if I shoot straight on then I get this great flash reflection.
 Obviously the back.
 Obviously the front.
The nitro is still damp, but this is the color it will end up. I kind of like it. Parchmenty color to me. The neck is a bit lighter is color, but that is OK with me.
*************************************************************************
21 Nov, 2003
It will be another 2 weeks before the BigsbyCaster is ready to play, because my spraying schedule has been erratic. I finally finished the neck a week ago, so it has to set another week before I can do the finish sanding. And I figure a week to put it together.
But I want it NOW!
*************************************************************************
1 Dec, 03
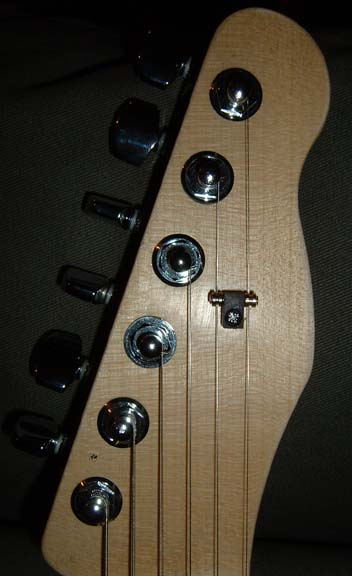
Today I started by finishing the neck. The blue painters tape that I put on the fret board to protect it from overspray left a bit of residue, so I had to steel wool that off. Then I wet-sanded the back and top of the head stock with 400 grit sand paper. The back of the neck, where the hand runs, I wet-sanded with some very fine sand paper, 12000 grit by their standard, which is different from the standard grades. It is all nice and smooth now. And I put on my decal. I went to put on the tuners, but they are a bit different from what I am used to. All the other tuners that I have put on in the past have had a screw to hold them into the head stock. Instead, these Fender tuners have two nubs on them, kind of like canine teeth. I assume that they are correct, but I am not sure how to attach them. How to force them, or how hard.
*************************************************************************
2 Dec, 03
I put the tuners in today. The Vampire fangs are correct. So the way to do this is to push the tuner in far enough to mark where the holes go, and then drill the holes. Put the tuner in and put on the nut & washer. Very simple to do. I find it easier, now that I understand it, to do than the types where you have to drill holes and insert screws.
**************************************************************************
8 Dec, 03
I went to fit the neck and put on the Bigsby tail piece.
 The neck pocket was not quite right, so I put down a piece of tape and marked where
I needed to route. So I did that and......
The neck pocket was not quite right, so I put down a piece of tape and marked where
I needed to route. So I did that and......
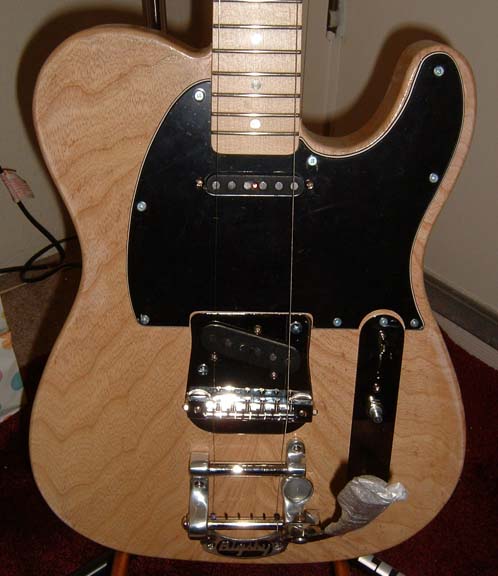
 It fit right and I put the tail piece on. I put some strings on it and it
lines up pretty well. It is not perfect, but close enough for hand work when I don't
know for sure what I am doing.
It fit right and I put the tail piece on. I put some strings on it and it
lines up pretty well. It is not perfect, but close enough for hand work when I don't
know for sure what I am doing.
The next step to final sand & polish, then fit it all together and play it. Yee-hah.
And I did. Sort of. I put it all together and put two strings on it to test the electronics. And it works!!!!!! Yea!!! I am short one neck screw before I put the strings on it, the nut is way too high. And I think that action will still be too high. But those are details. It works.
**************************************************************************
10 Dec, 03
I discovered a challenge with putting a Bigsby B5/TOM on a Tele. The bridge sits much higher than a stock bridge. So either the neck has to be shallower, the whole bridge complex sunk into the body, or the neck shimmed up a bit. I don't know the answer yet, but I will try to find out.
**************************************************************************
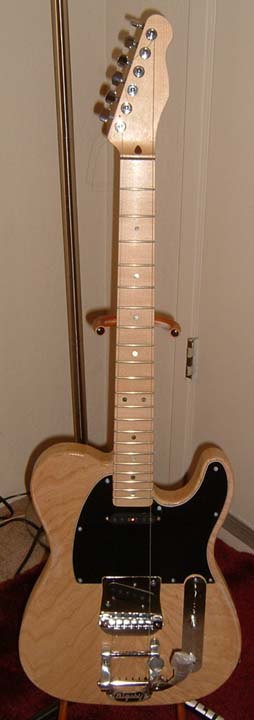
17 Dec, 03
 Done. Finito. Over. Finally. And I love it.
Good tone and good feel.
Done. Finito. Over. Finally. And I love it.
Good tone and good feel.
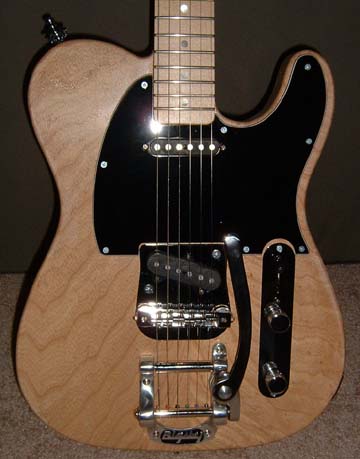 You can't tell unless you look close, but the tail piece is actually a few mils
towards the lower bout. Look at the angle of the strings between the bridge and the
tail piece.
You can't tell unless you look close, but the tail piece is actually a few mils
towards the lower bout. Look at the angle of the strings between the bridge and the
tail piece.
 If you follow this
link you will see another option besides shimming the neck. The issue is real
simple: The TOM bridge sits higher than the standard Tele bridge. Just a fact of
life. I did not realize this when I started so I had to shim. Setzer chose to
recess the whole Bigsby. But you have to make sure that you have enough room for the
bridge PUP. He did.
If you follow this
link you will see another option besides shimming the neck. The issue is real
simple: The TOM bridge sits higher than the standard Tele bridge. Just a fact of
life. I did not realize this when I started so I had to shim. Setzer chose to
recess the whole Bigsby. But you have to make sure that you have enough room for the
bridge PUP. He did.
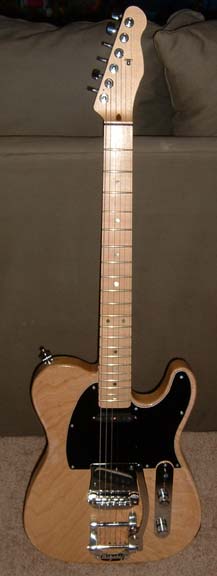
 And some genius came up with..... A roller string tree!!!
***************************************************************************
18 May, 04
So all this time, there has been something in the tone of the guitar that left me a bit cold, that I did not like. While I was doing the Black Walnut Tele I figured it out. No string ground! Argh and other nasty words & phrases. That has since been cured, and it sounds much better now.